
Your first campaign · Chapter 5 of 7Pro: 1 a month · Pro 5x and up: unlimited
Create your first campaign
A campaign is a full promotion, like a launch, a sale or an event. Tell Elena what you’re promoting, check her plan, let the team make the posts, then review and approve each one. Nothing is published until you approve it.
Topics
A first campaign, reviewed and approved post by post.
Plan it with Elena
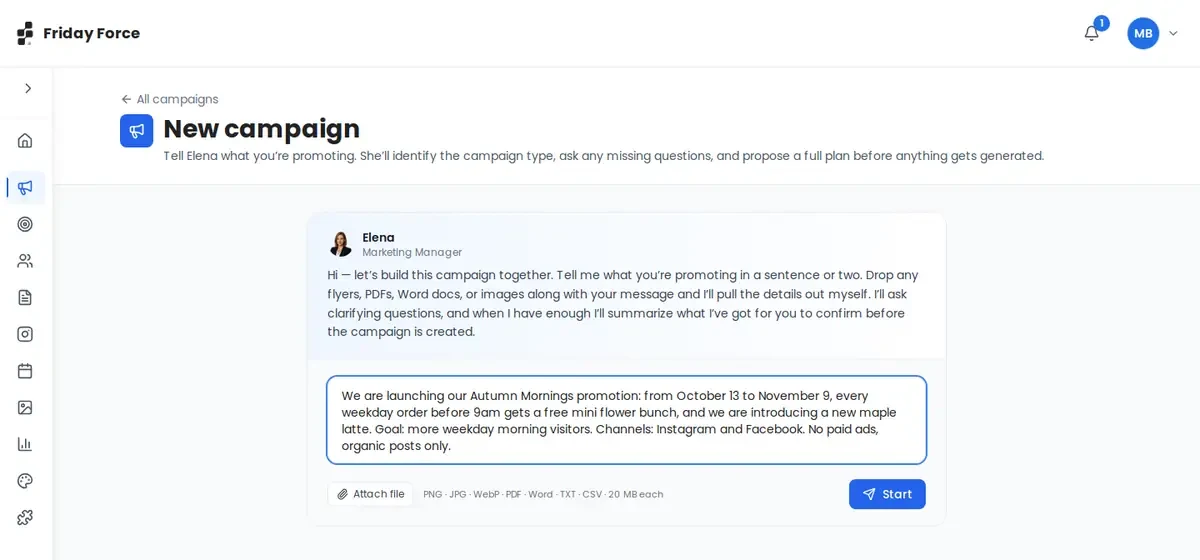
- Go to Campaigns and press New campaign. Tell Elena what you’re promoting. Attach a flyer, PDF or Word file, and she’ll pull out the details. Or start from a strategy: open it on the Strategies page and press Execute Strategy, and Elena opens a draft campaign already linked to it.
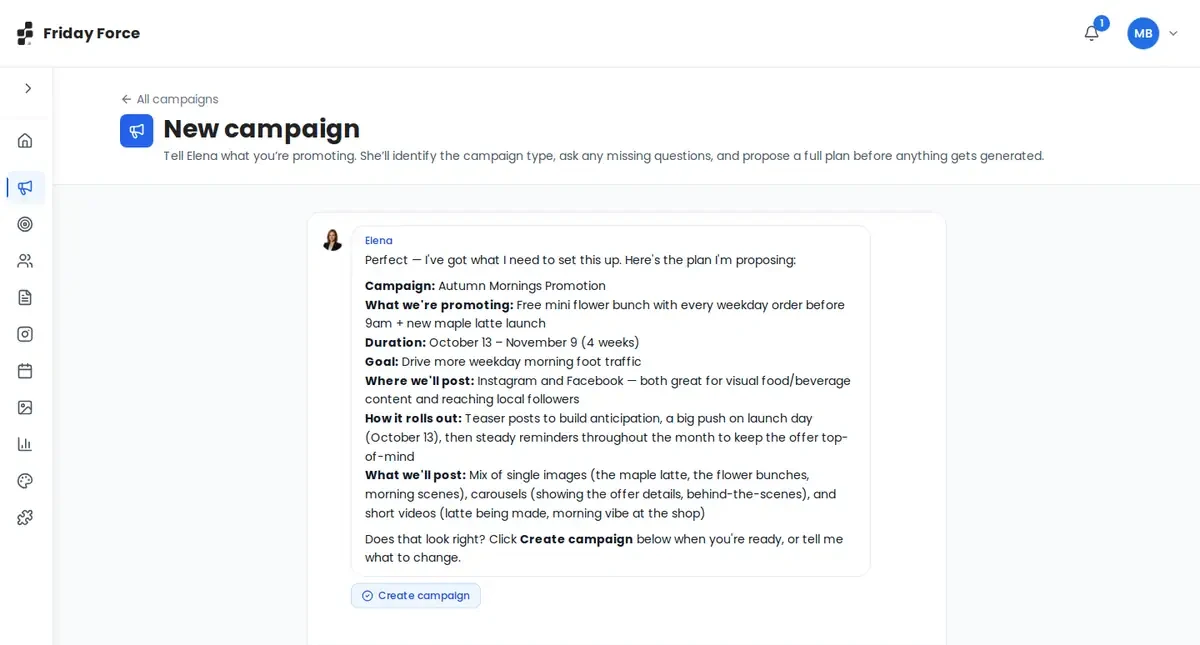
- Elena asks about anything that’s missing. Then she proposes a plan before anything is made: what’s promoted, dates, goal, channels and how it rolls out.
- Check the plan. Are the offer, dates and channels right? Ask for changes, or press Create campaign.
Set the campaign rules
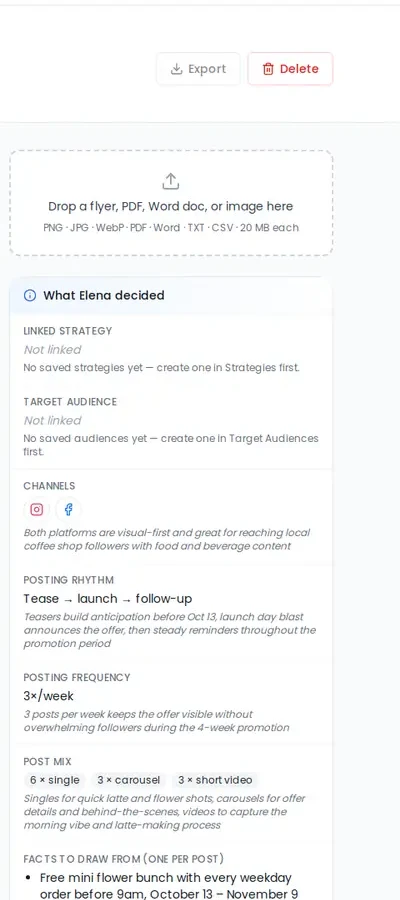
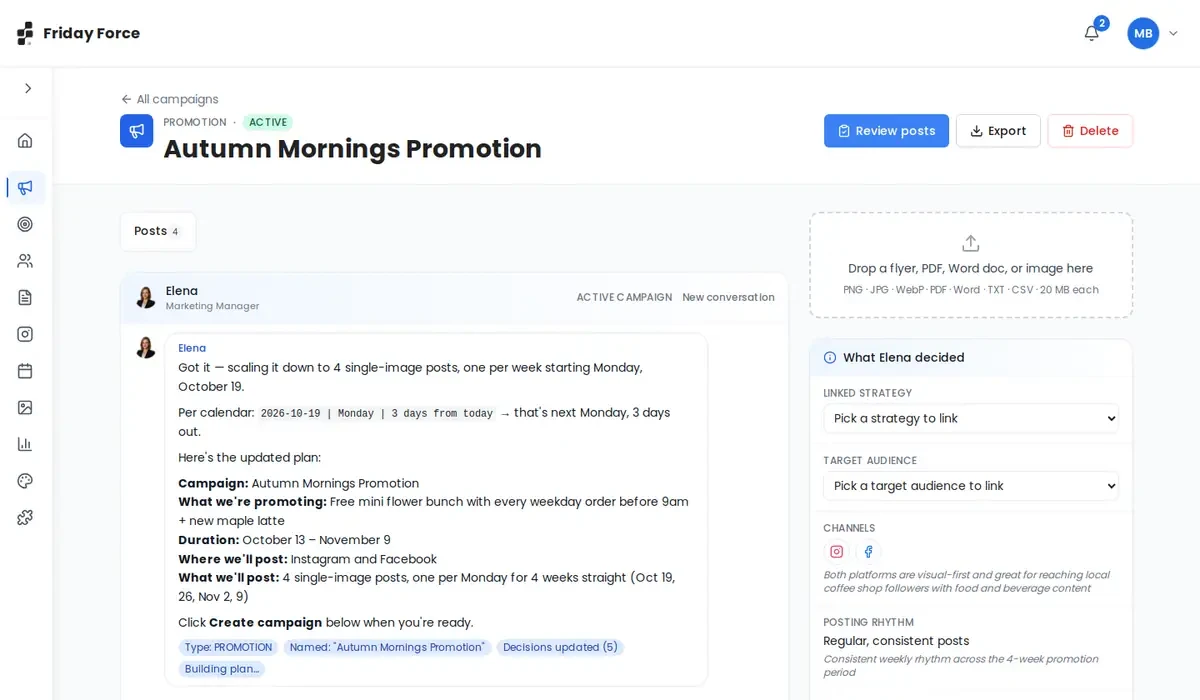
The campaign page opens with the chat with Elena and a What Elena decided panel. These settings keep every post accurate. Link a strategy and target audience from the drop-downs in the panel. To change anything else, tell Elena in the chat and she updates the panel.
| Setting | What to check |
|---|---|
| Linked strategy, Target audience | The right ones are linked, not “Not linked” |
| Facts to draw from | Offer, dates and conditions are exactly right. Posts are built from these. |
| Always in every post | Anything every post needs, like a disclaimer or your web address |
| Reference images for Priya | Real photos Priya should follow as a style guide |
| Posts made from your photos | Posts that should use your own photos, not AI images |
Reference images and posts made from your photos show “Not set” until you ask Elena, and you can’t edit them in the panel. Attach your photos in the chat, or name a photo from your Asset library, and tell her how to use them. For example: “Use the attached photo of our storefront in the launch post” or “Use our maple latte photo from the library as the style for every image.”
Check the draft plan
A moment later, the Draft plan appears: a list of posts, each with a title, date, format (single image, carousel or short video), phase (teaser, launch or follow-up) and the reason it’s there.
- Do the dates make sense? Teasers before the launch, nothing after the offer ends.
- Does each post use a real fact from the campaign?
- Is there enough variety in formats and topics?
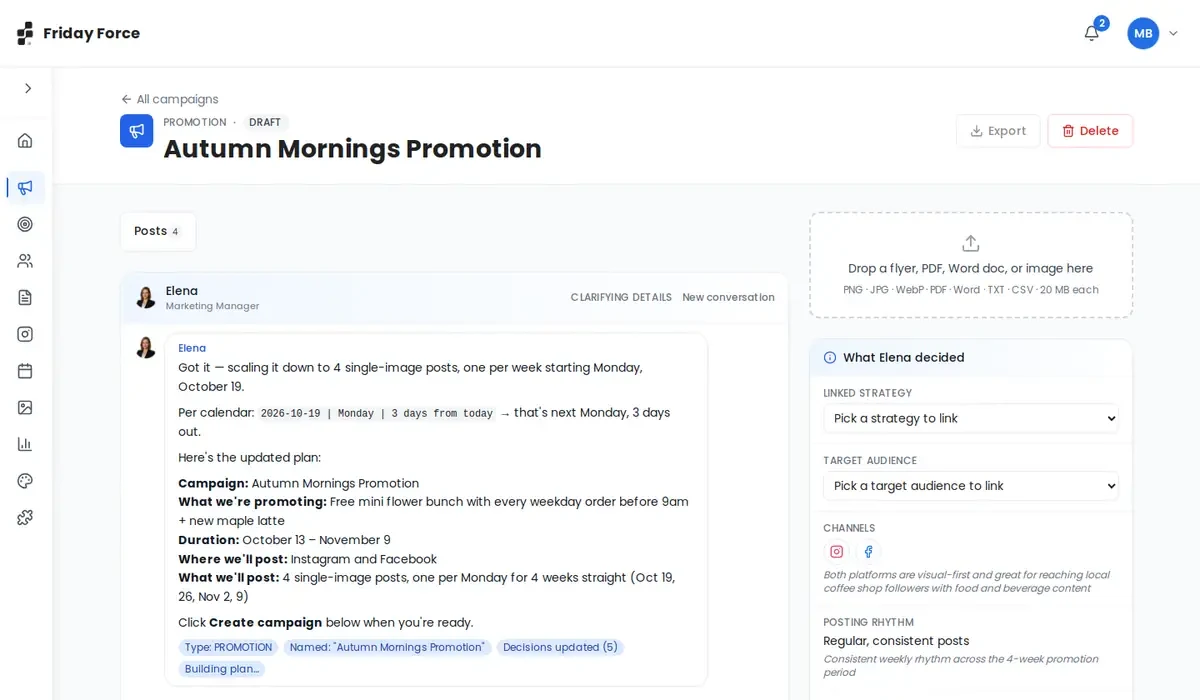
Not happy? Press Rebuild, or just tell Elena what to change. For example: “only 4 posts, all single images, one per week starting Monday October 19”. She rewrites the plan and updates What Elena decided.
Create the posts
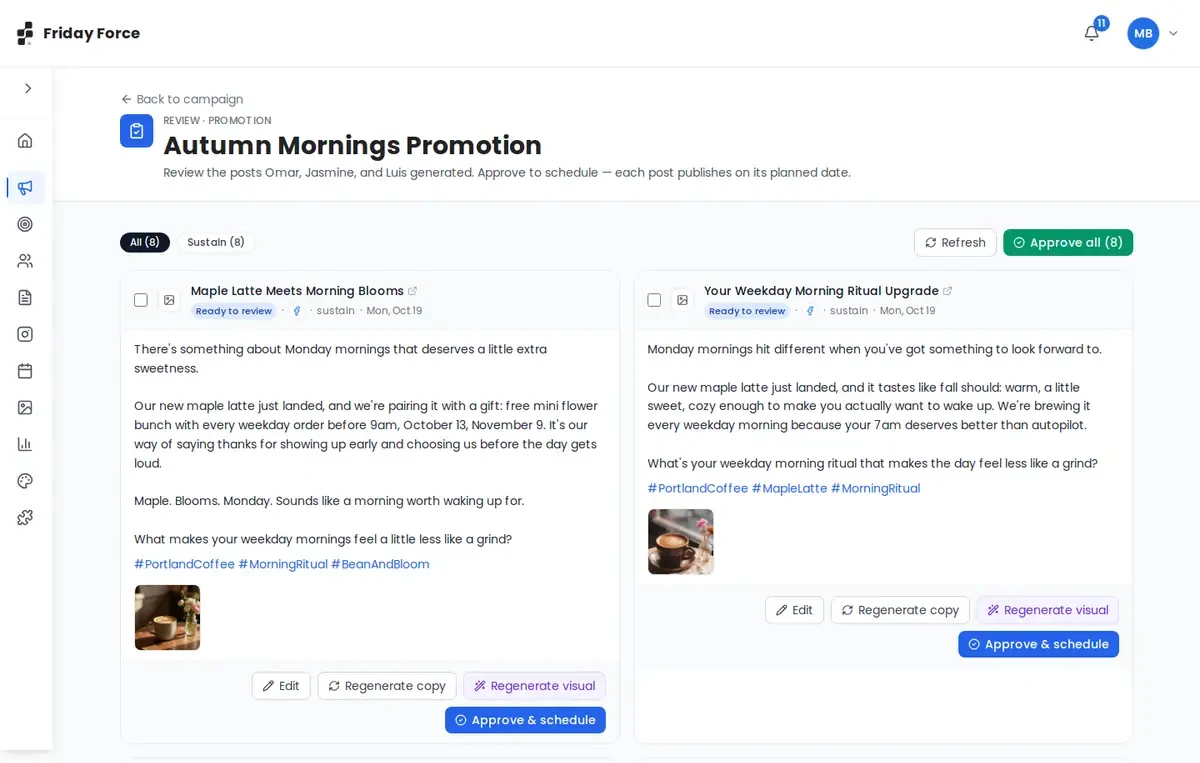
Press Execute (the button shows the number of posts, for example “Execute 4 posts”). The campaign becomes Active and the team writes and designs every post. Each planned post is made for every channel you chose, so 4 posts on Instagram and Facebook gives you 8. Nothing is published yet.
The work runs on our servers, so you can leave the page and follow the progress in the bell. It takes a while: the team writes the copy and designs the images for every post, and they all appear under Review posts. Go grab a coffee and come back to review the work.
If a campaign stops partway, it’s safe to press Execute again. See A campaign stopped partway.
Review and revise each post
Press Review posts at the top of the campaign. Every post is listed with its caption, hashtags, picture, platform and date, marked Ready to review. Check each one against the checklist below. To fix one, press Edit (free), Regenerate copy (Jasmine rewrites the caption) or Regenerate visual (Priya makes a new image).
For a specific change, like “Make it shorter” or “Match my brand colors”, see Ask the team to change a post.
Before you publish
Use this checklist for every post, campaign and blog.
- Business facts, products, prices and dates are accurate.
- Content matches your Brand Kit: colours, fonts, logo and voice.
- The target audience and campaign goal are right.
- Visuals show real, appropriate people, products and places.
- The call to action and link are correct. Click the link to make sure it works.
- Content variety and posting dates make sense.
- The channel is connected and you can post to it.
Approve and schedule
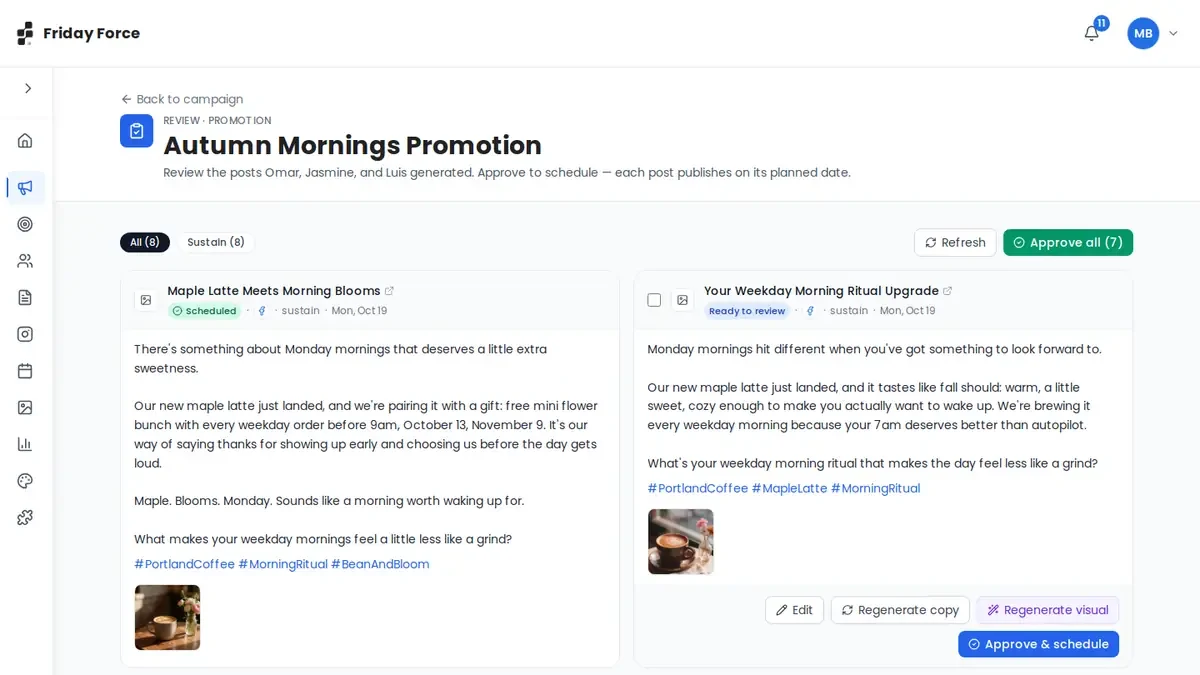
When a post passes the checklist, press Approve & schedule. It becomes Scheduled and is published on its planned date. Happy with all of them? Press Approve all at the top. Nothing is published until you approve it.
Change dates by chatting with Elena
After the campaign is launched, you can ask Elena in the campaign chat to move posts that are planned or scheduled. For example:
- “Push Wednesday’s LinkedIn post to Friday.”
- “Can we move the launch post a day earlier?”
- “Spread all the posts across October 1–30, and don’t put two of the same type back to back.”
To move everything by a few days at once, drag the posts on the Content Calendar instead.
If your workspace uses approvals, some posts need an approver first. See getting posts approved. Press Export to download the campaign, or Delete to remove it.
Every post passes the “Before you publish” checklist.
Screens were captured in October 2026 and may differ slightly from the current app. They show a made-up business, Bean & Bloom Coffee.
Still stuck? Ask the support team.